Multi-Factor Authentication (MFA) adds an additional layer of security to ICE by requiring users to verify their identity using a second factor (an authenticator app) in addition to their username and password. This helps protect user accounts from unauthorized access.
MFA behavior in ICE is controlled by administrators at the organization level and can be configured as Optional or Mandatory.
MFA Configuration by Admin (Site Configuration)
Organization Admins can configure MFA settings from the Site Configuration page using the options below.
- Is MFA Enabled
Check the box to allow all users and agents under the organization to optionally enable MFA from their user profile settings. - Is MFA Mandatory
Check the box to enforce MFA for all users under the organization. When enabled, MFA becomes compulsory and users cannot disable it from their profile.
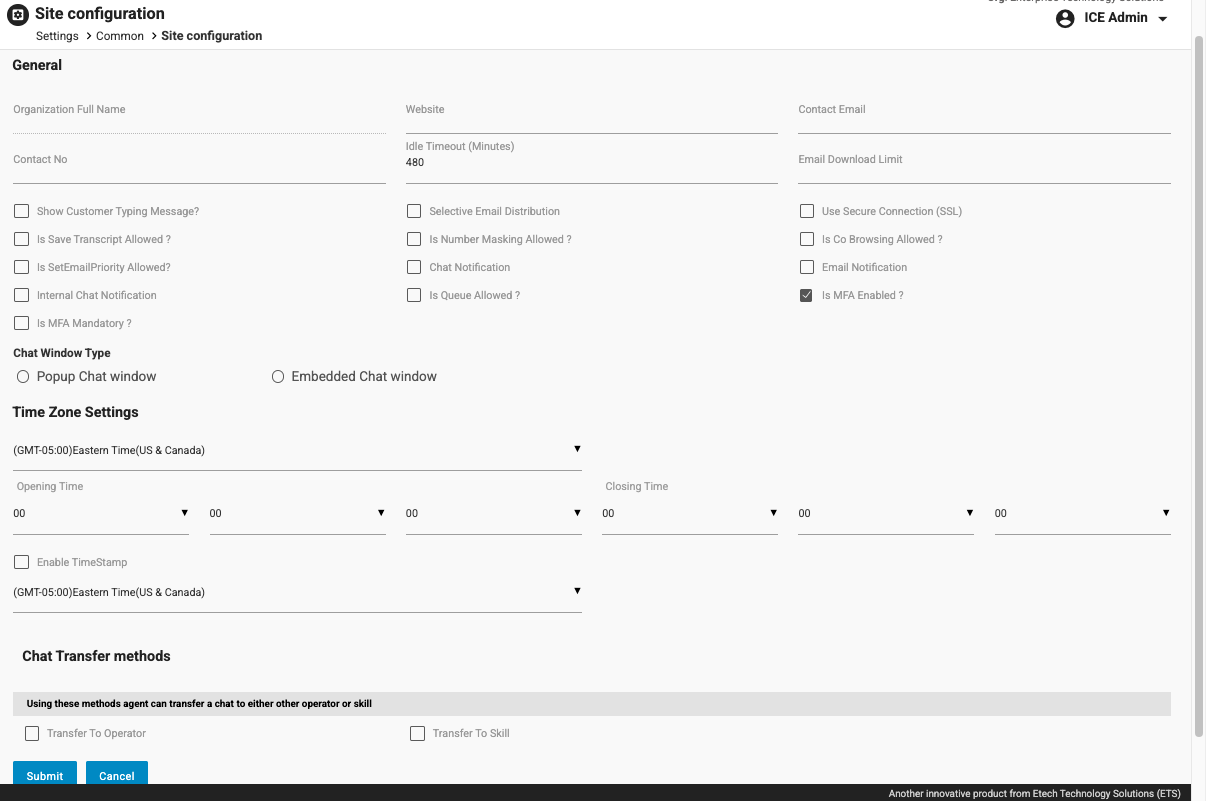
Note: If MFA is mandatory, the Enable MFA option in the user profile is disabled, as MFA is enforced automatically.
MFA Setup – User Flow
Prerequisites
- Valid ICE username and password
- Access to a supported authenticator app (Microsoft Authenticator, Google Authenticator, Authy, etc.)
Scenario 1: MFA Enabled (Optional)
When MFA is enabled but not mandatory, users can choose to enable or disable MFA from their profile.
Steps to Enable MFA from User Profile
- Log in to ICE using your username and password.
- Click on Profile and navigate to the Settings tab.
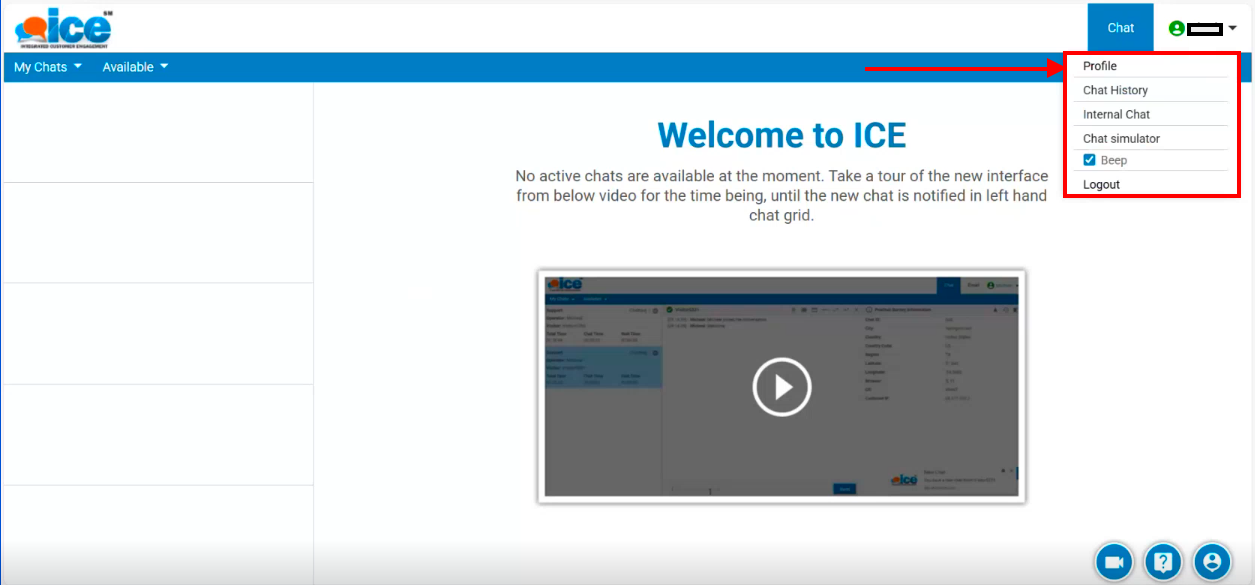
- Locate the Enable MFA checkbox.
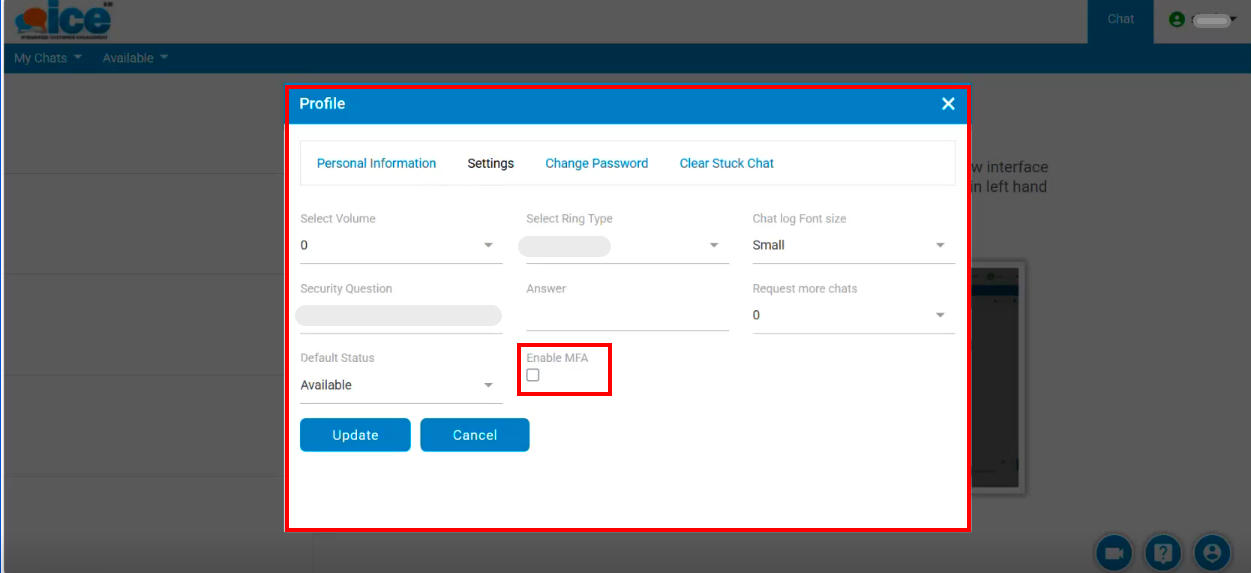
- Check the box and click Update.
Log out and log back in to access the Enable Two-Factor Authentication setup screen.
Scenario 2: MFA Mandatory
When MFA is marked as mandatory by the admin:
- Users are required to set up MFA during their next login.
- The Enable MFA checkbox in user profile settings is disabled.
- Users cannot skip or disable MFA.
The MFA setup steps (Authenticator app setup, QR code scan, verification, and recovery codes) remain the same as described above.
MFA Configuration Steps
Step 1: Install an Authenticator App
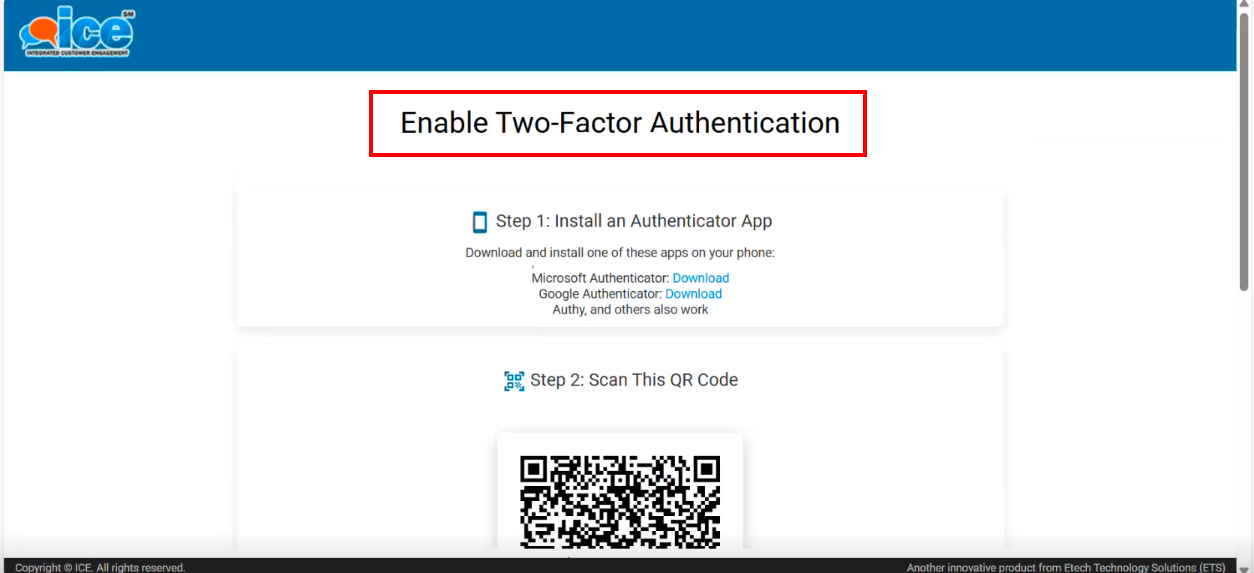
Download and install a supported authenticator app on your device:
-
Microsoft Authenticator – download using the link provided on the screen
-
Google Authenticator – download using the link provided on the screen
-
Authy or any other compatible authenticator app
-
You may also install a supported browser extension and complete the setup if preferred
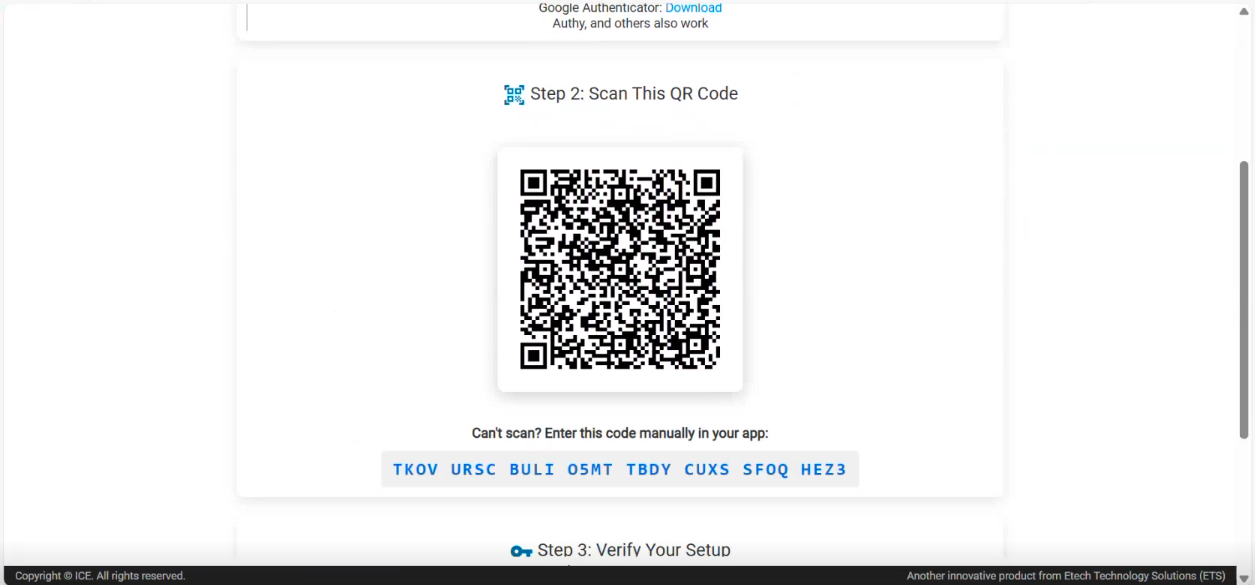
Step 2: Scan QR Code or Enter Manual Code
- Open the authenticator app on your device.
- Scan the QR code displayed on the screen.
- If scanning is not possible, enter the provided manual setup code into the app.
Step 3: Verify Your Setup
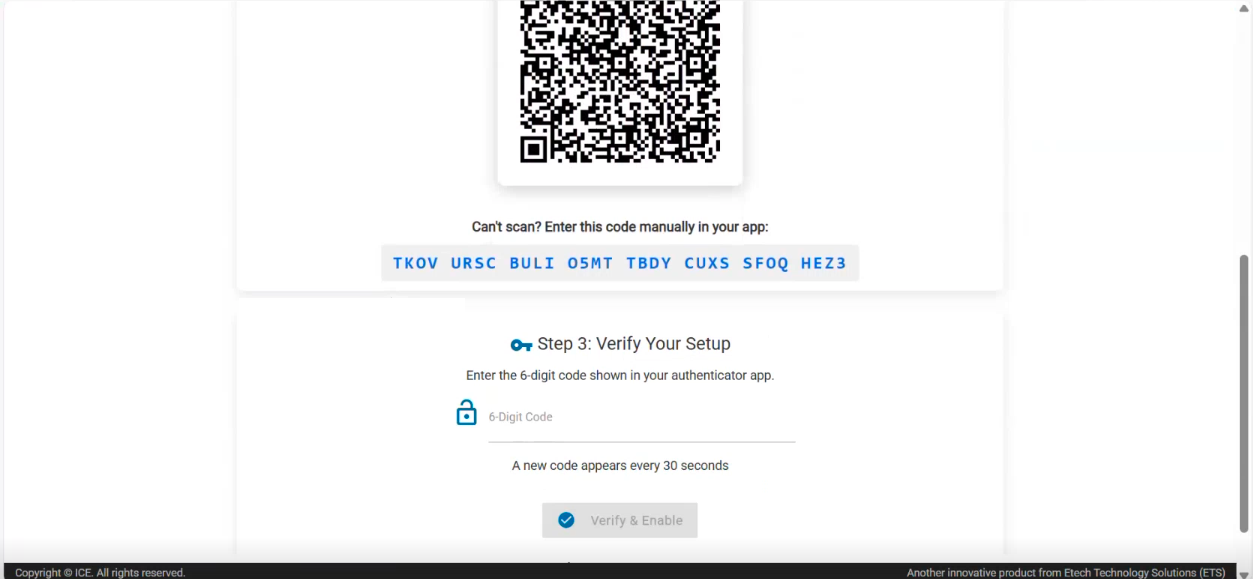
- Enter the 6‑digit verification code generated by the authenticator app.
- Click Verify & Enable.
- Enter the next verification code when prompted to complete the setup.
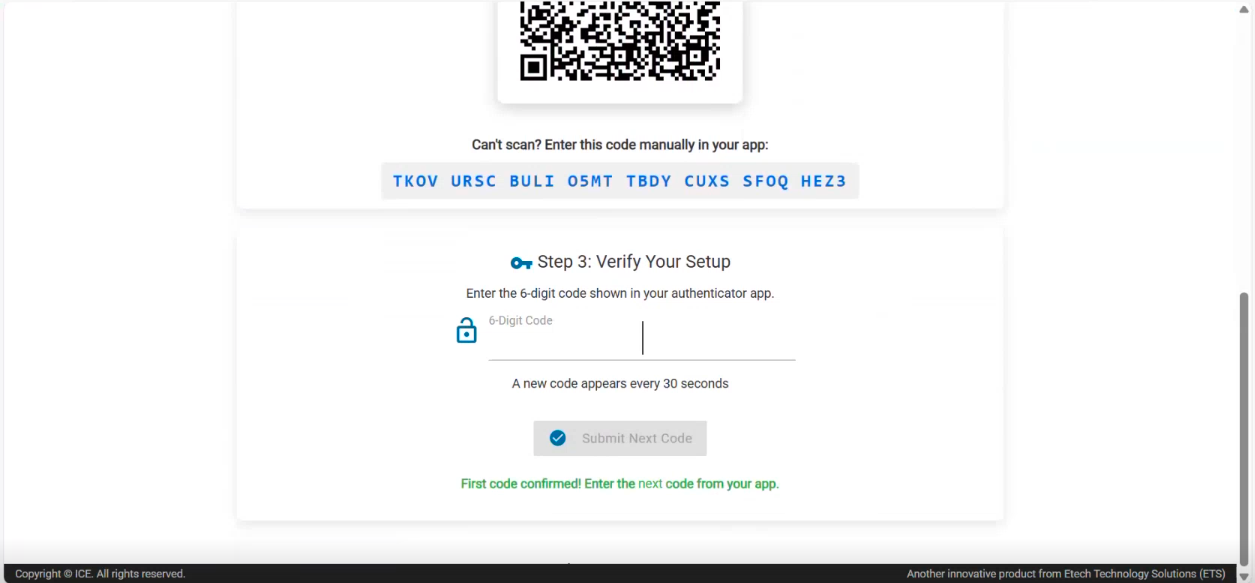
Once verified, MFA will be enabled successfully for your account.
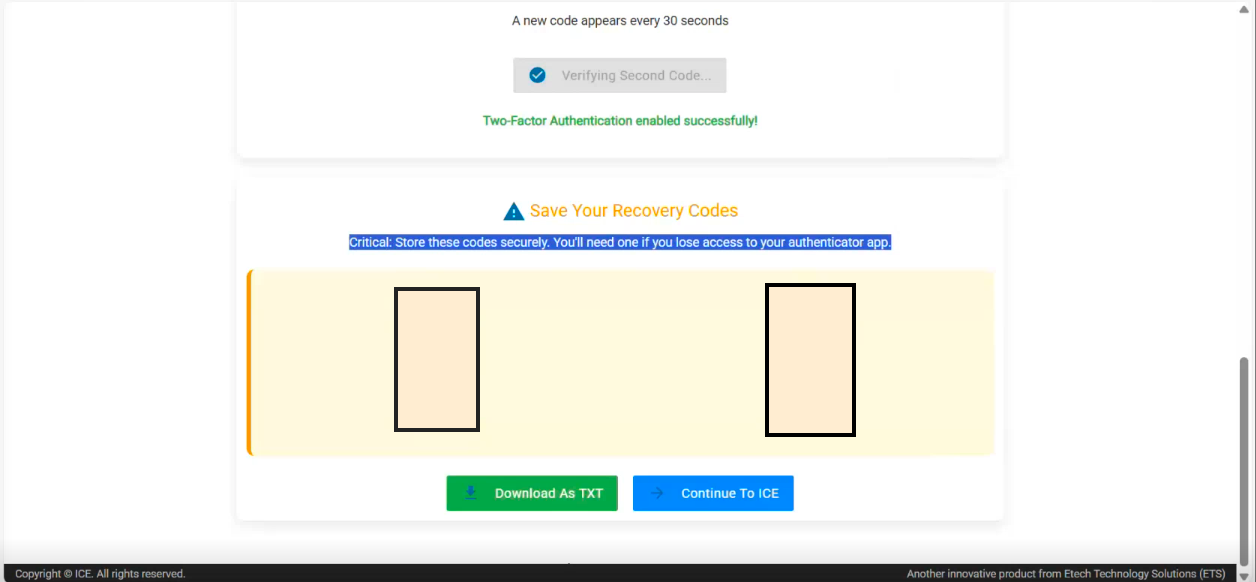
Step 4: Save Recovery Codes
- After successful MFA activation, recovery codes are displayed.
- Download or securely store these codes.
- Recovery codes are required if you lose access to your authenticator app.
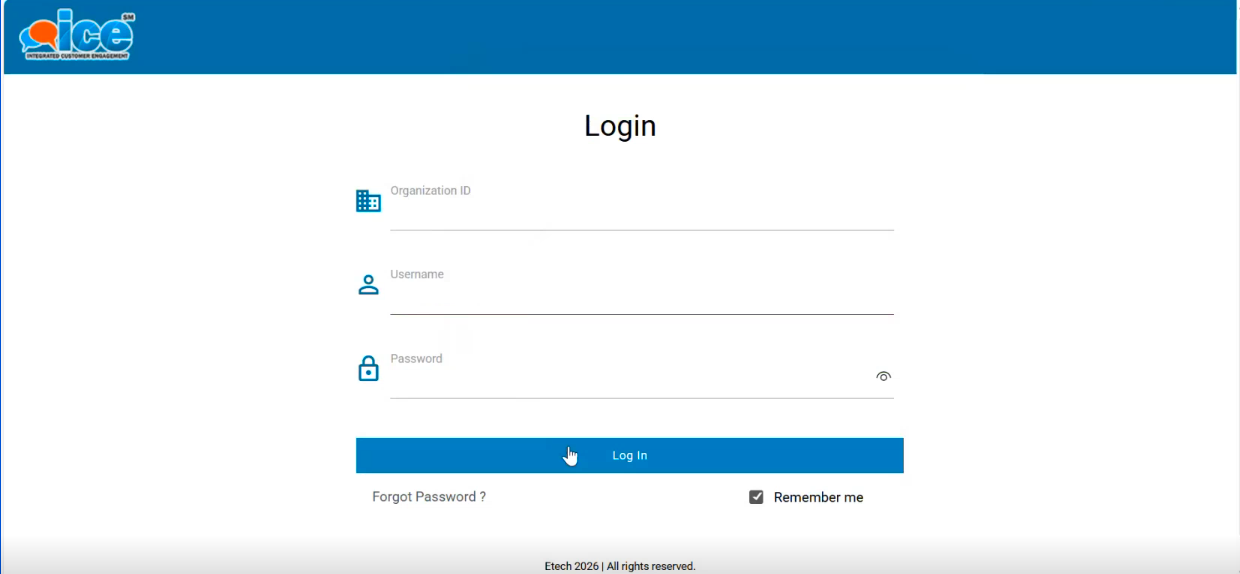
Login Experience After MFA Setup
Once MFA is configured:
- User enters Organization ID, Username, and Password.
- User is redirected to the Two‑Factor Authentication page.

- User enters the 6‑digit code from the authenticator app.
- Login is completed successfully after verification.
This second‑factor authentication is required every time the user logs in.
Key Notes
- MFA provides enhanced security for ICE user accounts.
- Admins control whether MFA is optional or mandatory.
- Recovery codes must be stored securely.
- Authenticator codes refresh every 30 seconds.