When the regular agents reach their chat limit, the new chats initiated by the visitor(s) waiting in the queue, will be routed to the available overflow agent. Such chats will be routed skill-wise and the available overflow agent of the respective skill will be assigned with it. The chats will stop routing to overflow agents as soon as the regular agents are available. The feature and capabilities of the overflow agents is same as the regular agents.
If the supervisor is taking incoming chats and is available then the chats will be firstly routed to the supervisor and later to the overflow agent
Adding Overflow Agent
To add a new overflow agent, follow the steps mentioned below:
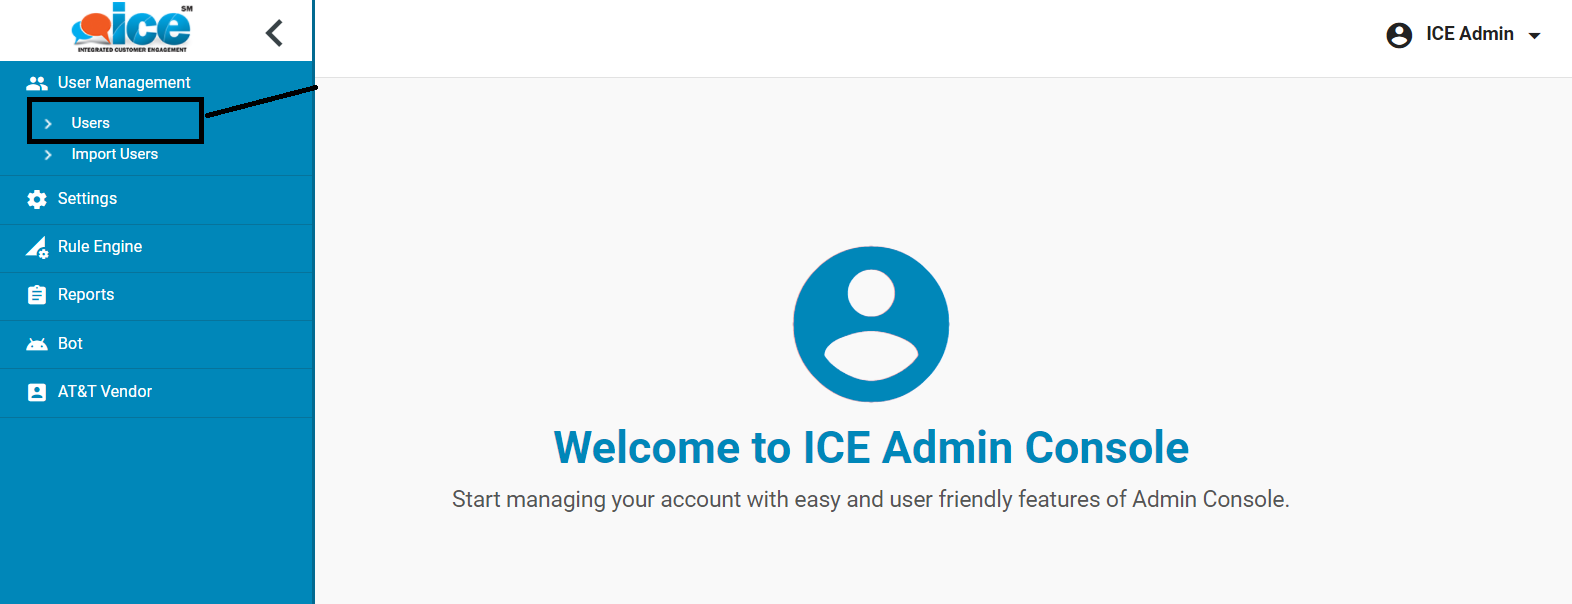
- Select User Management > Users from the left panel on the Admin console.
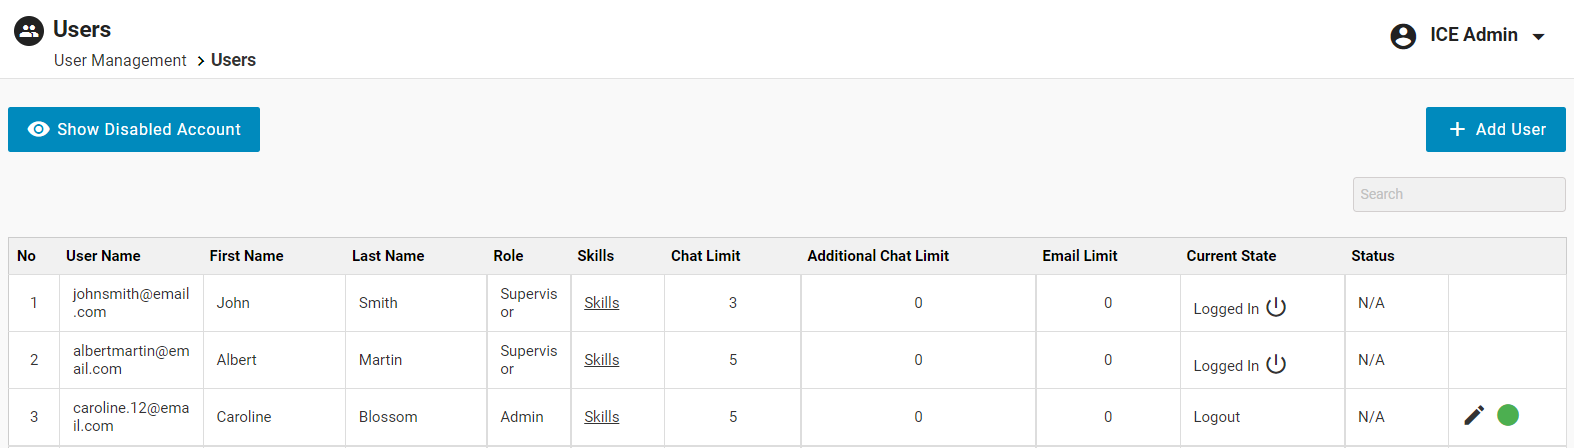
- The system displays the Users console as shown below.
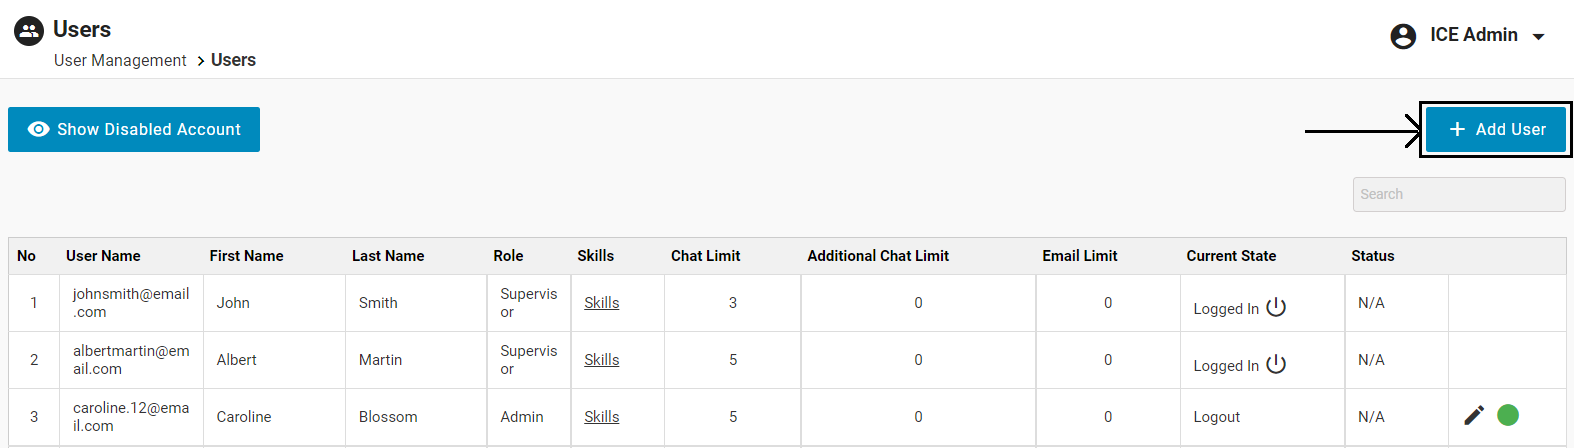
- Click Add User.
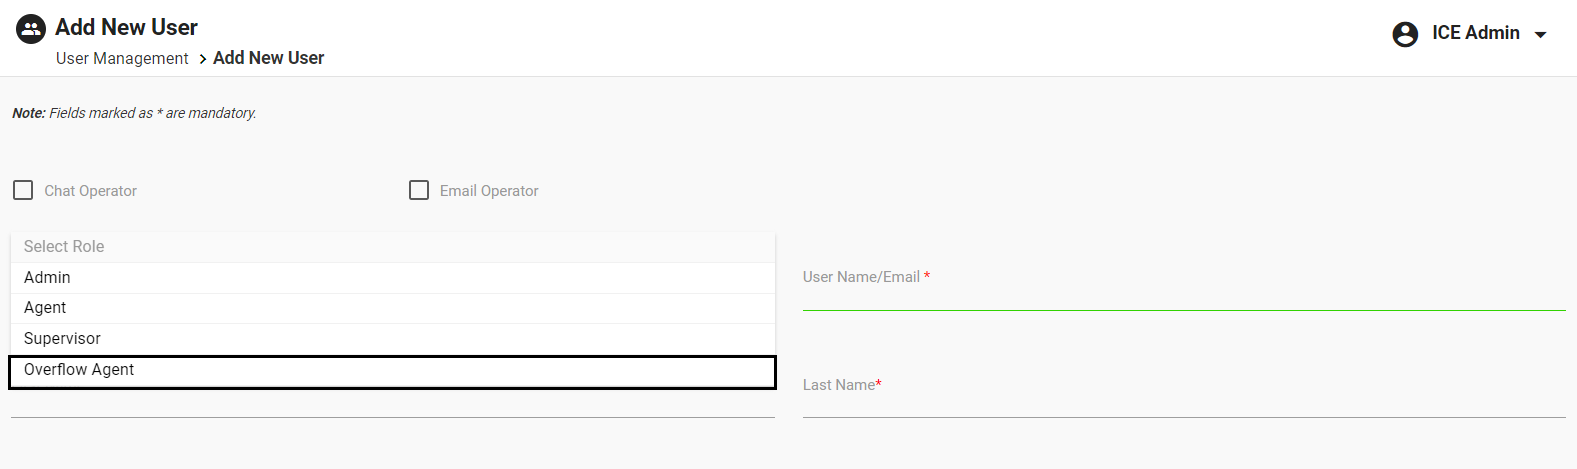
- Select the Role dropdown on the Add New User page as shown highlighted in the below screen.
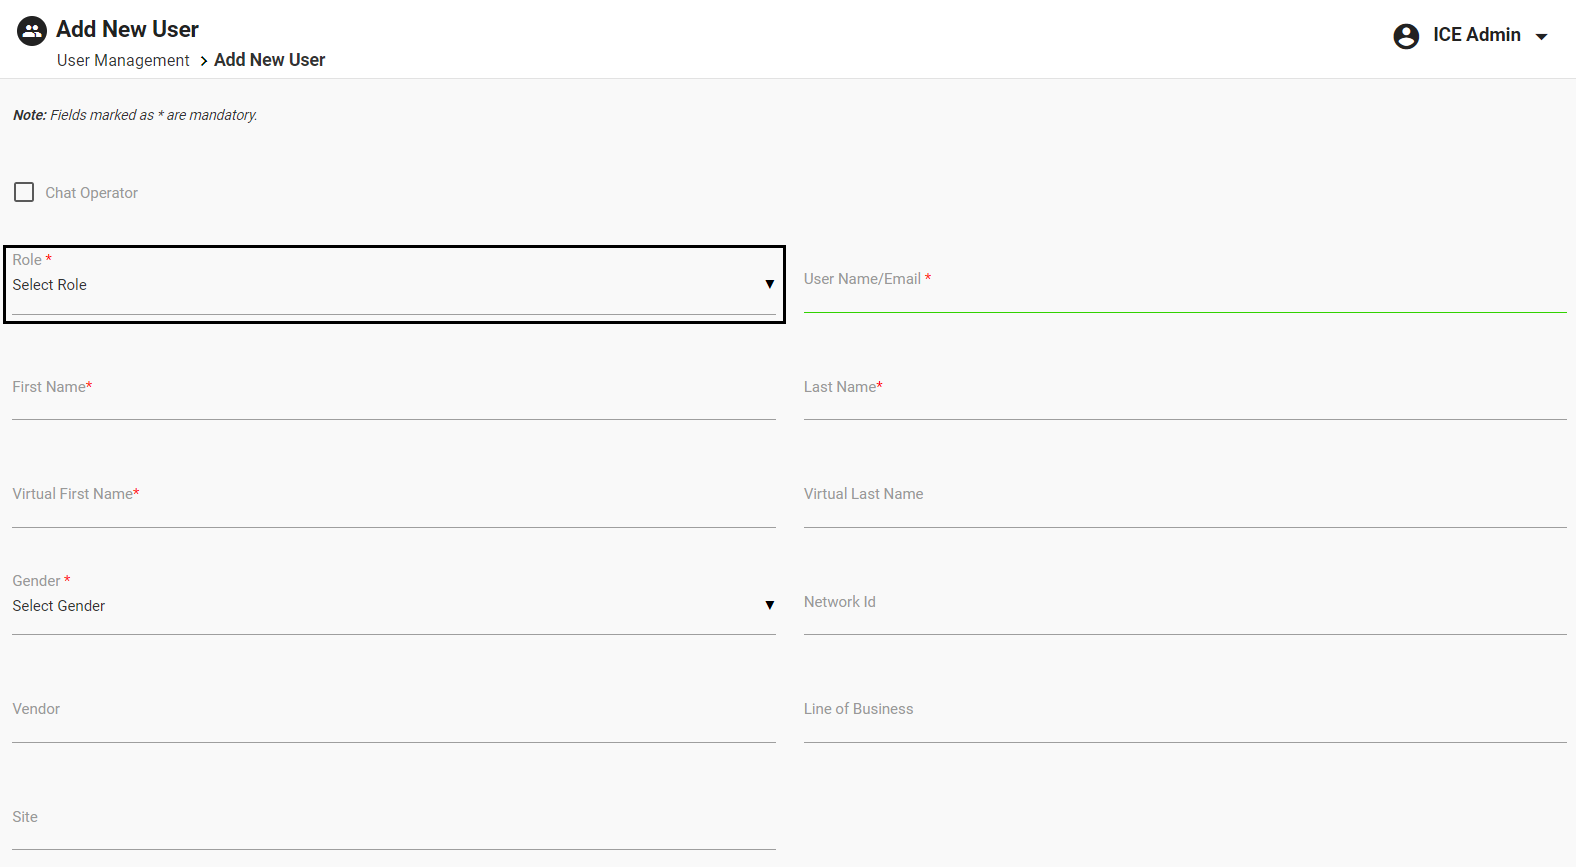
- The list of different user roles will be displayed. Select Overflow Agent from the Role dropdown list.
Enter all the details in the fields of the overflow agent console as mentioned below the adjoining screen.
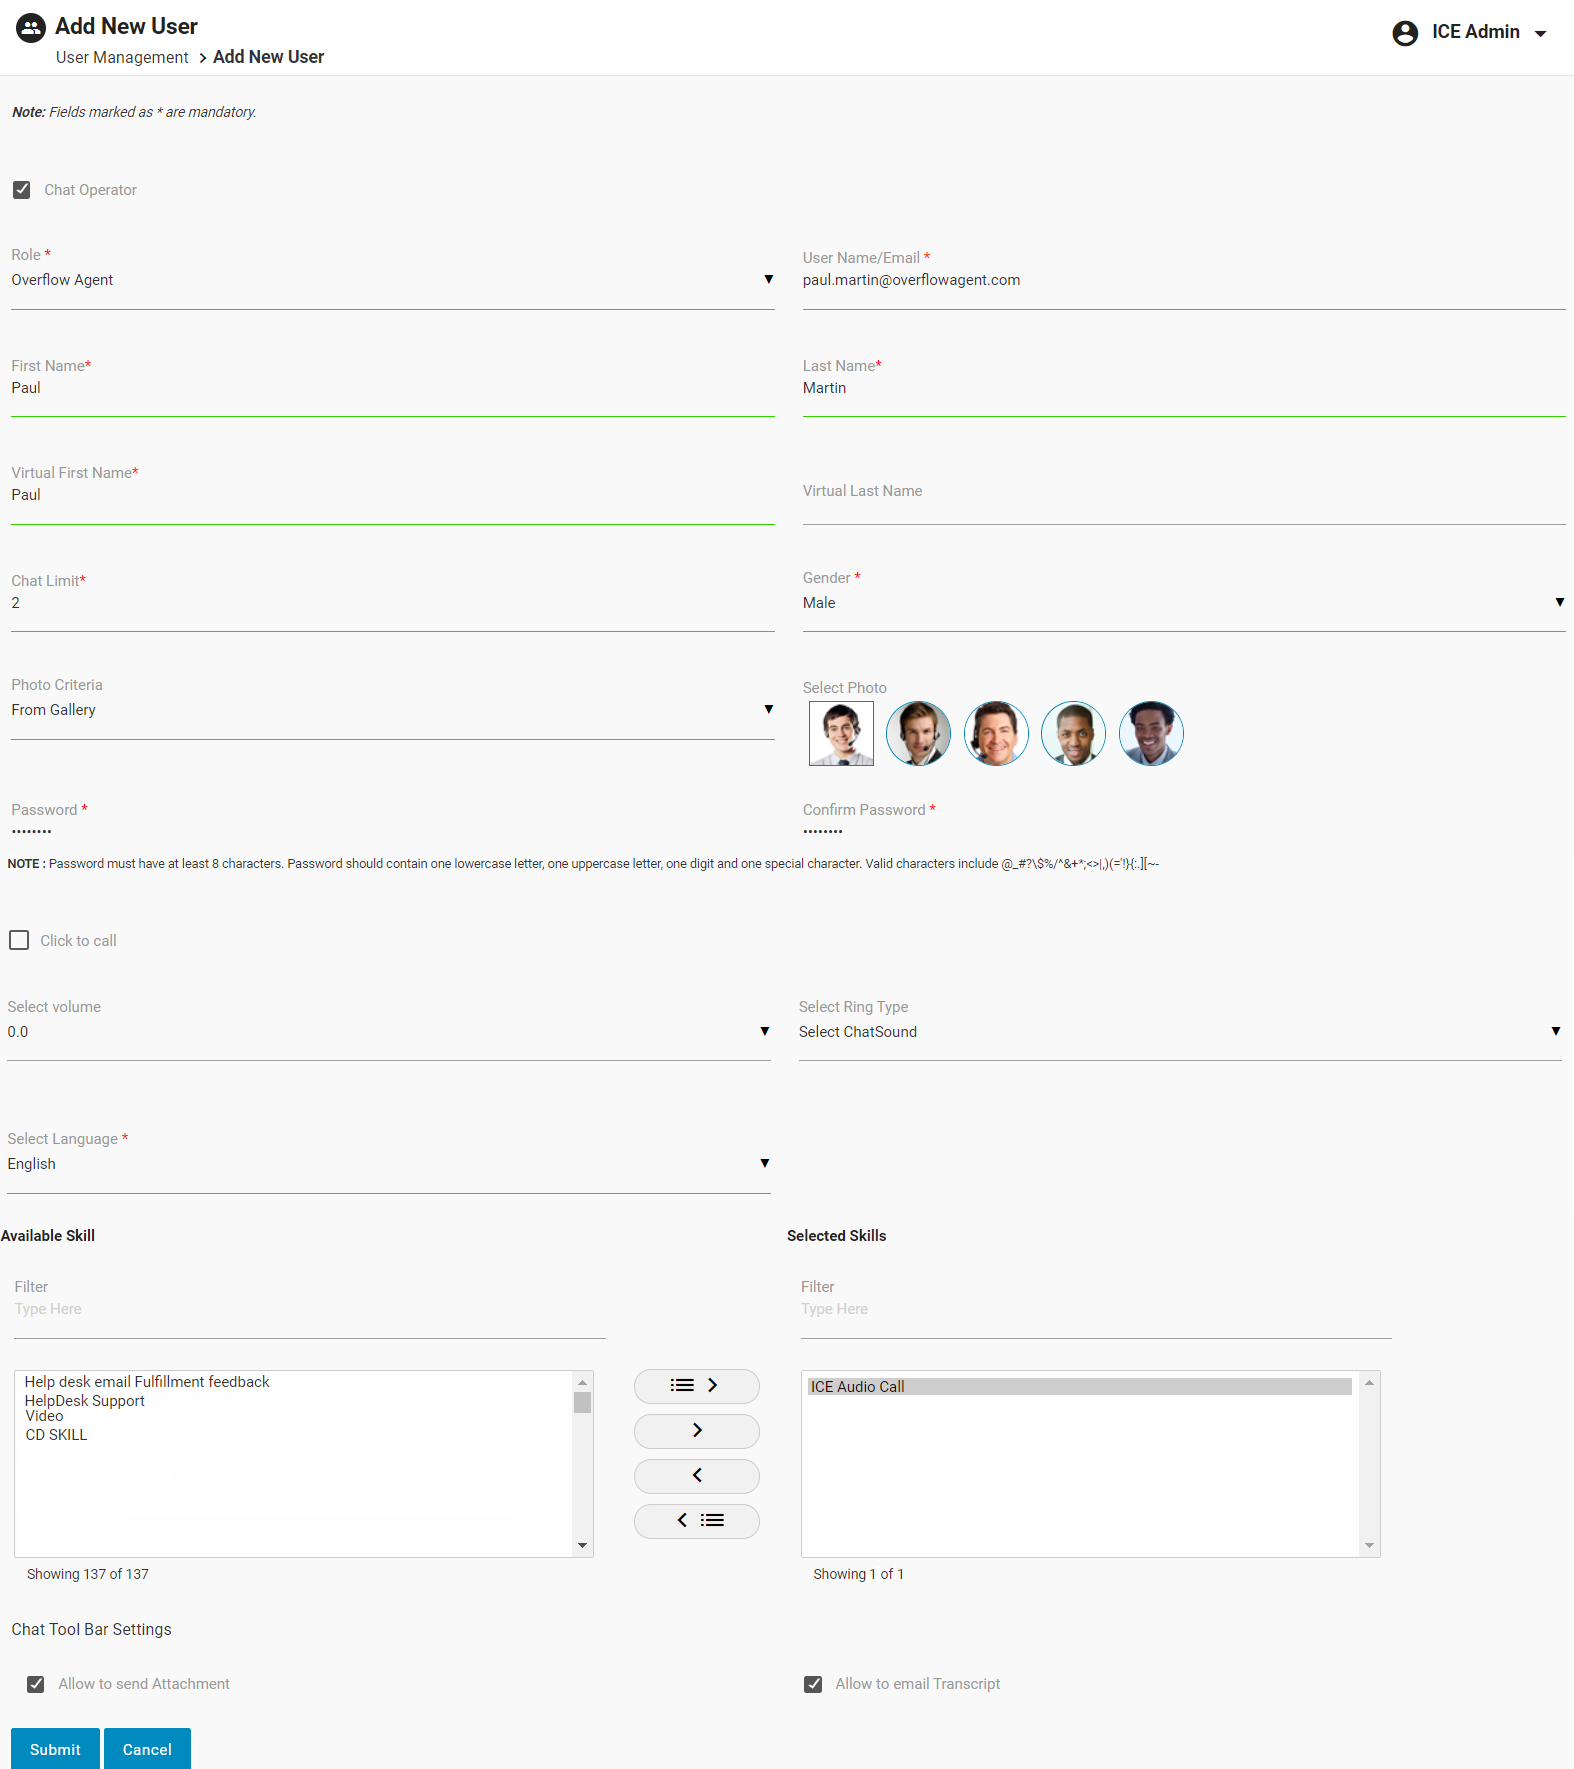
Select Chat Operator checkbox if the overflow agent will be the chat operator.
Enter the user name or email address of the overflow agent in the User Name/Email
Enter the First Name and the Last Name of the overflow agent.
Enter the Virtual First Name and Virtual Last Name of the overflow agent which are to be displayed to the visitors.
Enter the Chat Limit for the overflow agent.
Select Gender of the overflow agent.
Once the gender is selected, Photo Criteria field will be displayed. Select the desired option of adding photo for the profile picture of the overflow agent from the dropdown list – From Gallery, Browse Photo or Photo URL.
- From Gallery: Select the picture of the overflow agent from the gallery.
- Browse Photo: Click Browse. Select the photo of the overflow agent from the local system.
- Photo URL: Enter the URL of the photo of the overflow agent.
Note: Make sure the system supported photo formats which are .jpg, .gif, and .png.
Enter the Password for the overflow agent’s account. Further, enter that same value in the Confirm Password.
Note: Password Rules
- Password character range: Minimum 8 – Maximum 128
- Passwords should contain at least one lowercase, one uppercase, one digit, and one special character.
- Valid special characters are – @_#?\$%/^&+*;<>|,)(=’!}{:.][~-
Set the volume level of the incoming chat notification from the Select Volume
Select the ring tone of the incoming chat notification from the Select Ring Type
Select the language in which the overflow agent will be communicating with the visitors from the Select Language
Select skill(s) which is/are to be assigned to the overflow agent from the options displayed under the Available Skill. Click on icon to move the selected skill(s) under the Selected Skill.
Under the Chat Tool Bar Settings, select Allow to send Attachment checkbox to allow the overflow agent to access the attachment tool.
Select Allow to email Transcript checkbox to allow the overflow agent to access the email transcript tool.
Click Submit to save all the configured details of the overflow agent.
Click Cancel to discard the details.
After the overflow agent profile is created, the administrator also has the feasibility to update or edit the details of overflow agents.
Supervisor Dashboard
Once the overflow agent profile is created and is online, the supervisor’s dashboard will display the information as shown below:

Note: If the supervisors select Take Incoming Chats checkbox from their console, then all the details displayed in this dashboard will also include their information.
Displayed in the above screen, the console includes the following components with their own set of functions such as:
- Total Login Users displays the cumulative count of logged-in agents and overflow agents.
- Ongoing Chats displays the cumulative count of chats ongoing with agents and overflow agents.
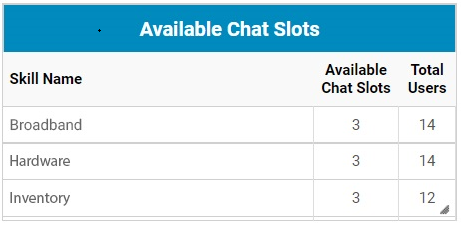
- The Available Chat Slots table in the Supervisor Dashboard will only display the total number of available chat slots assigned to the agents and supervisors for respective skills. The available chat slots of overflow agents will not be taken into consideration here.
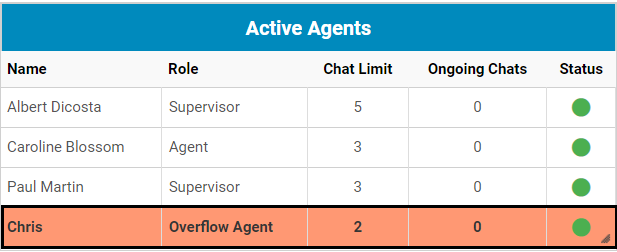
- Under the Active Agents table, the overflow agent will always be displayed in the highlighted format as shown below.
- Skill Stats displays the cumulative ongoing chats cumulative of agents, supervisors and overflow agents.
- Ongoing Chats displays the list of chats ongoing with agents, supervisors and overflow agents. The overflow agents’ chat will be highlighted for easy identification.
- Total Chats Requested calculates the data for agents, supervisors and overflow agents.
- Average Wait Time calculates the data for agents, supervisors and overflow agents.
- Average Chat Time calculates the data for agents, supervisors and overflow agents.
- Average Concurrent Chats calculates the data for agents, supervisors and overflow agents.
- Available Operators will display the list of available agents, supervisors and overflow agents.