To configure SLA follow the steps given below.
1.Click ![]() to add a new SLA and the following screen appears.
to add a new SLA and the following screen appears.
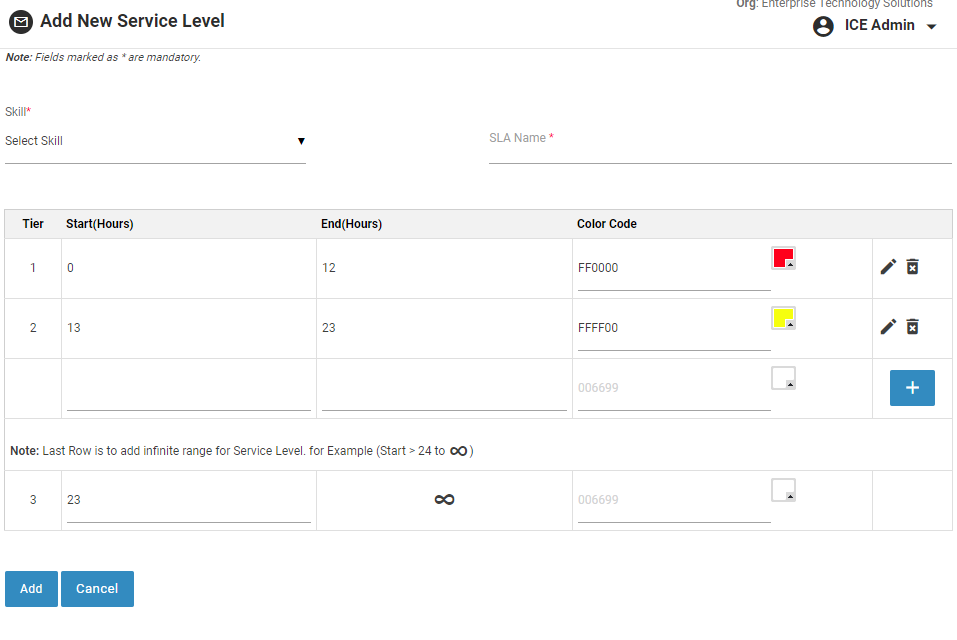
Add SLA
2.Select Skill for which the service level is to be created from the dropdown list.
3.Provide name for the SLA in SLA Name field.
4.By default, the service level hours have been divided into tiers 0-12, 12-23 and 23-infinity. These hours can be edited by clicking on ![]() icon.
icon.
5.Enter the Start and End hours in the respective fields.
6.Click ![]() icon to select the appropriate color code. The color code of the selected color will appear in the Color Code field.
icon to select the appropriate color code. The color code of the selected color will appear in the Color Code field.
7.Click on the ![]() icon to save the changes made as shown in screen below.
icon to save the changes made as shown in screen below.
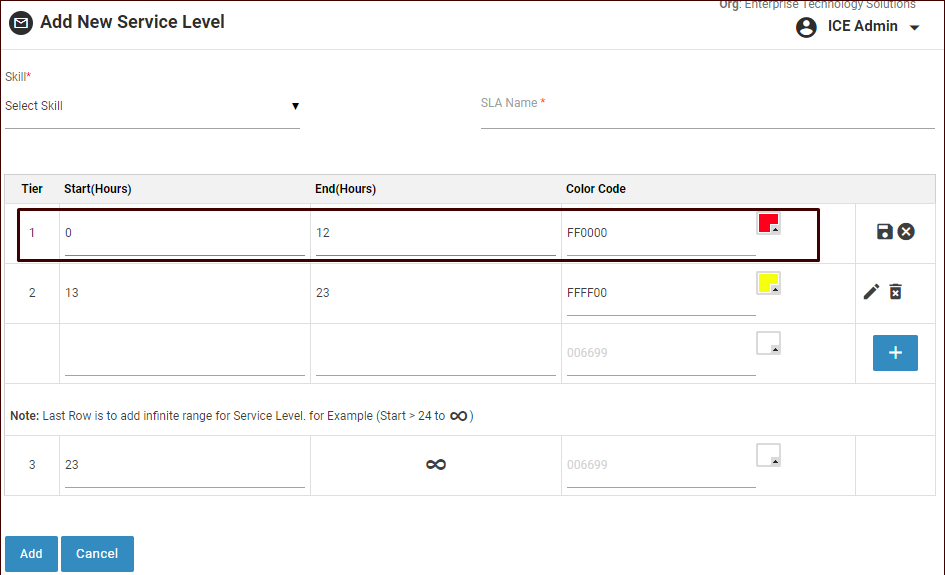 Save Service Level
8.Click ![]() icon to add a new tier.
icon to add a new tier.
9.Select Color Code for the last row to add infinite range for Service Level.
10.Click ![]() button to add SLA or click
button to add SLA or click ![]() button to cancel the process.
button to cancel the process.
11.The newly created SLA will be visible in the grid of Manage Service Level page.
12.By default the newly created service level is in disabled state. Click ![]() icon to enable the Service Level
icon to enable the Service Level
13.Click ![]() icon from the manage screen to edit a Service Level. Once the changes are done, click
icon from the manage screen to edit a Service Level. Once the changes are done, click ![]() button to update the changes made or click
button to update the changes made or click ![]() button to cancel the process and return to the Manage Service Level screen.
button to cancel the process and return to the Manage Service Level screen.
14.Click  icon from the grid to delete a Service level. The system will generate the following prompt message-

Click  to proceed with the form deletion process. Click
 ![]() to cancel the process.
to cancel the process.