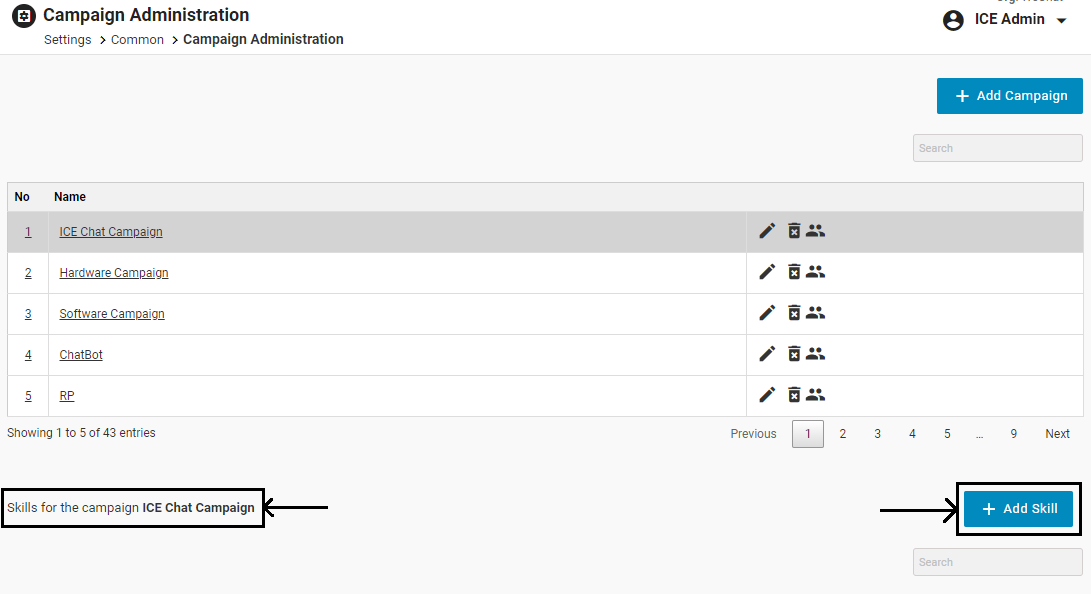
A skill can be added to a particular campaign from Settings > Common > Campaign Administration console.
To add a new skill to a campaign, firstly, select the campaign, and then, click on  button highlighted on the following screen:
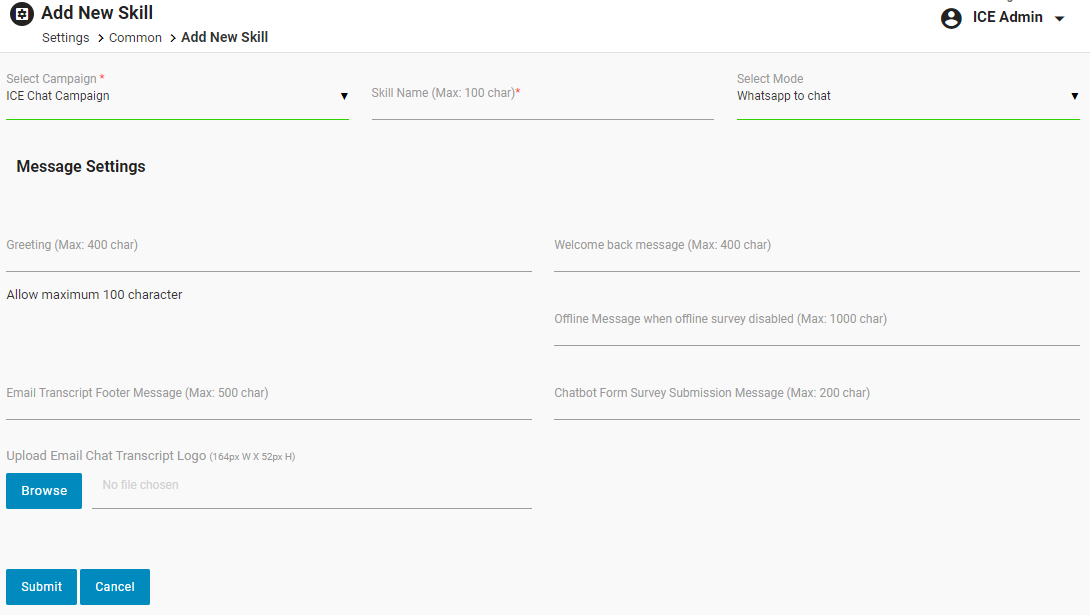
The system will redirect the user to the following screen:

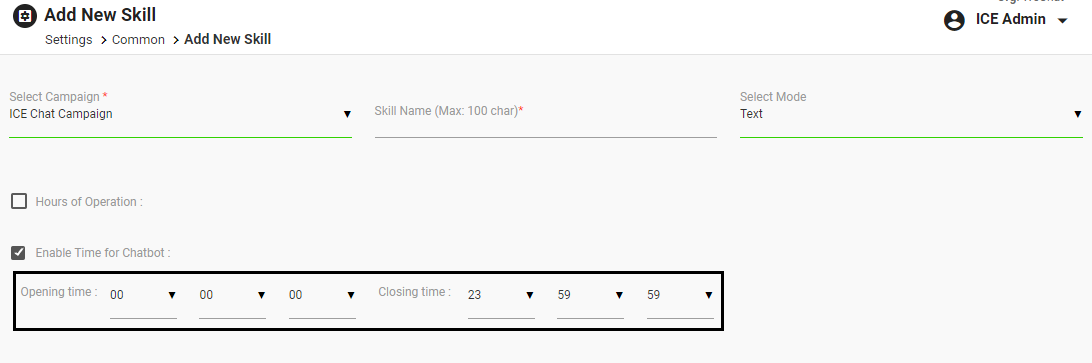
Configure the following fields:
Campaign: Select a campaign from the dropdown list for which a new skill needs to be created.
Skill Name: Enter the name of the new skill.
Mode: Select the type of mode from the dropdown list. The options are:
-
- Text
- SMS to Chat
- Whatsapp to Chat
Text Mode
The Text Mode has the following screen elements:
| Screen Elements | Description |
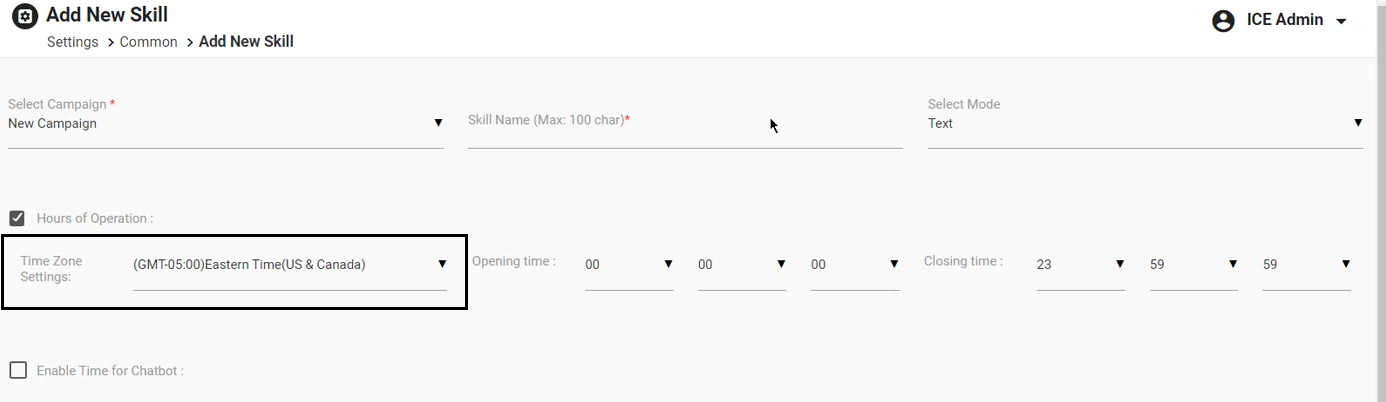
| Hours of Operation | Select this checkbox to configure the hours of operation of all the features of the campaign to which the new skill is assigned to. Once this checkbox is selected, the following fields will be displayed.
Time Zone Settings: ICE Admin and the ICE Supervisor with admin rights will be able to set a time zone along with the hours of operation for each skill.
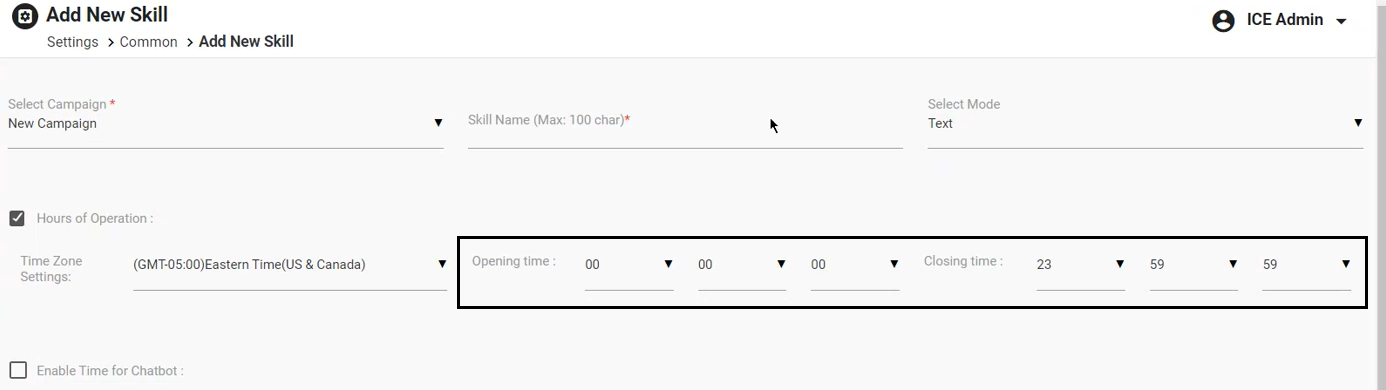
Once the time zone is selected, set the Operation hours: Opening Time and Closing Time.
|
| Enable Time for Chatbot | Select this checkbox to assign the operation time of the chatbot. Once selected, set the operation time: Opening Time and Closing Time.
|
| Auto Display Exit Survey | Select this checkbox to display the exit survey to the visitors automatically at the end of the chat. |
| Skill Based Routing | Select this checkbox to route the chats to the agents assigned with the skill for which the chat has been initiated by the visitors |
|
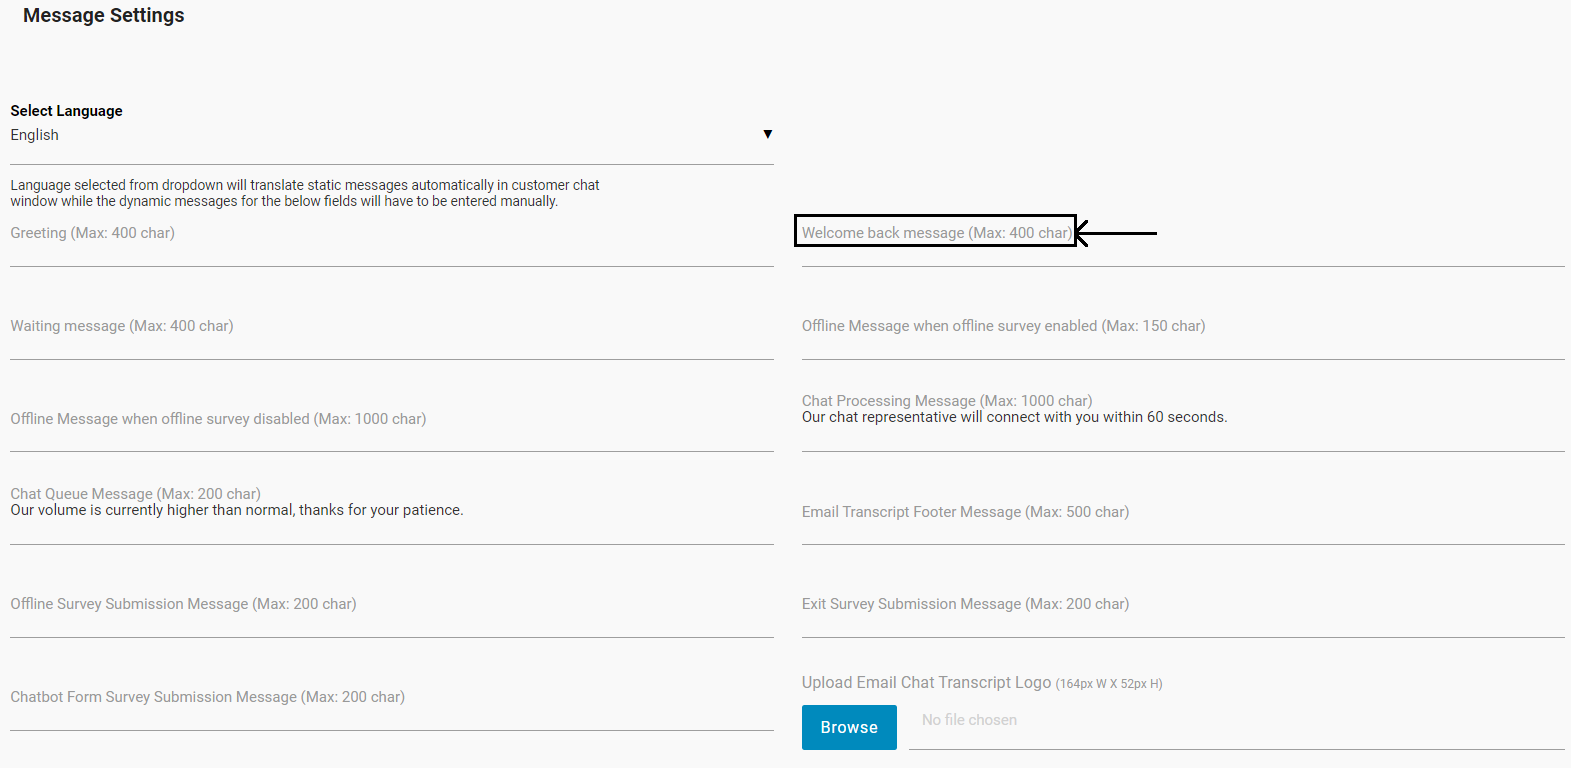
Message Settings |
|
|
Language |
Select the language from the dropdown list, in which the message needs to be configured and displayed to the visitors. Note: Language selected from the dropdown will translate static messages automatically in the customer chat window while the dynamic messages for the below fields will have to be entered manually. |
|
Greeting |
Enter the greeting message which will be displayed when the contacted with customer. |
|
Welcome Back Message |
Enter welcome back message. |
|
Waiting Message |
Enter waiting message. |
|
Offline Message |
Enter offline message which will be displayed when the operator is offline. |
|
Chat Processing Message |
Enter chat processing message. |
|
Chat Queue Message |
Enter the message to be displayed in the visitor console when the chat is in the queue. Click here to view the message in the visitor console. |
|
Email Transcript Footer Message |
Enter footer message for Email transcript |
|
Offline Survey Submission Message |
Enter the message to display to the visitors once they submit the Offline Survey. |
|
Exit Survey Submission Message |
Enter the message to display to the visitors once they submit the Exit Survey. |
| Chatbot Form Survey Submission Message |
Enter the message to display to the visitors once they submit the Chatbot Form Survey. |
|
Upload Email Chat Transcript Logo |
Upload logo that will be displayed in chat transcript sent as an email to a recipient. |
|
Disclaimer Message |
Select this checkbox to display the default disclaimer message on the visitor console. The disclaimer message can also be customized |
For each message setting field displayed under the Message Settings section, maximum characters’ limit notes will be visible.
The format of the maximum characters’ limit note will be like (Max: ### char) for example, (Max: 400 char) as shown below:
- Greeting (Max: 400 char)
- Welcome back message (Max: 400 char)
- Waiting message (Max: 400 char)
- Offline Message when offline survey enabled (Max: 150 char)
- Offline Message when offline survey disabled (Max: 1000 char)
- Chat Processing Message (Max: 1000 char)
- Email Transcript Footer Message (Max: 500 char)
- Chat Queue Message (Max: 200 char)
- Offline Survey Submission Message (Max: 200 char)
- Exit Survey Submission Message (Max: 200 char)
- Chatbot Form Survey Submission Message (Max: 200 char)
Notes:
- The spaces are also calculated as a part of the characters’ length.
- The user will not be able to enter characters more than mentioned in the note on any field.
Once a new skill is added, it will be added to the list of all the skills which will be displayed on Settings > Common > Campaign Administration page as shown below:
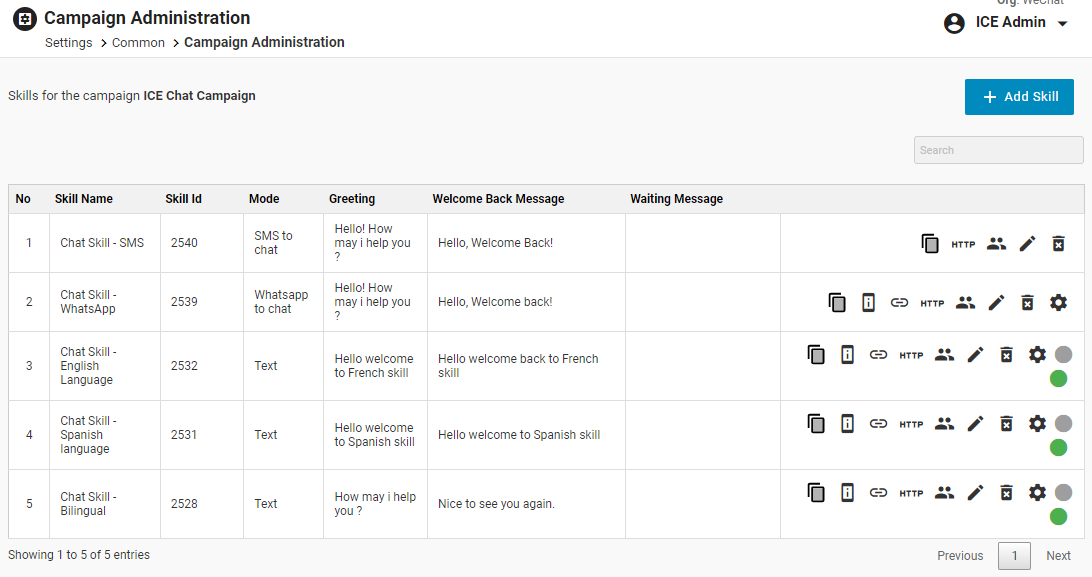
Following information will be displayed on this table:
- Skill Name
- Skill ID
- Mode
- Greeting
- Welcome Back Message
- Waiting Message
Email Mode
When Email Mode is selected, the following screen is redirected to the user-
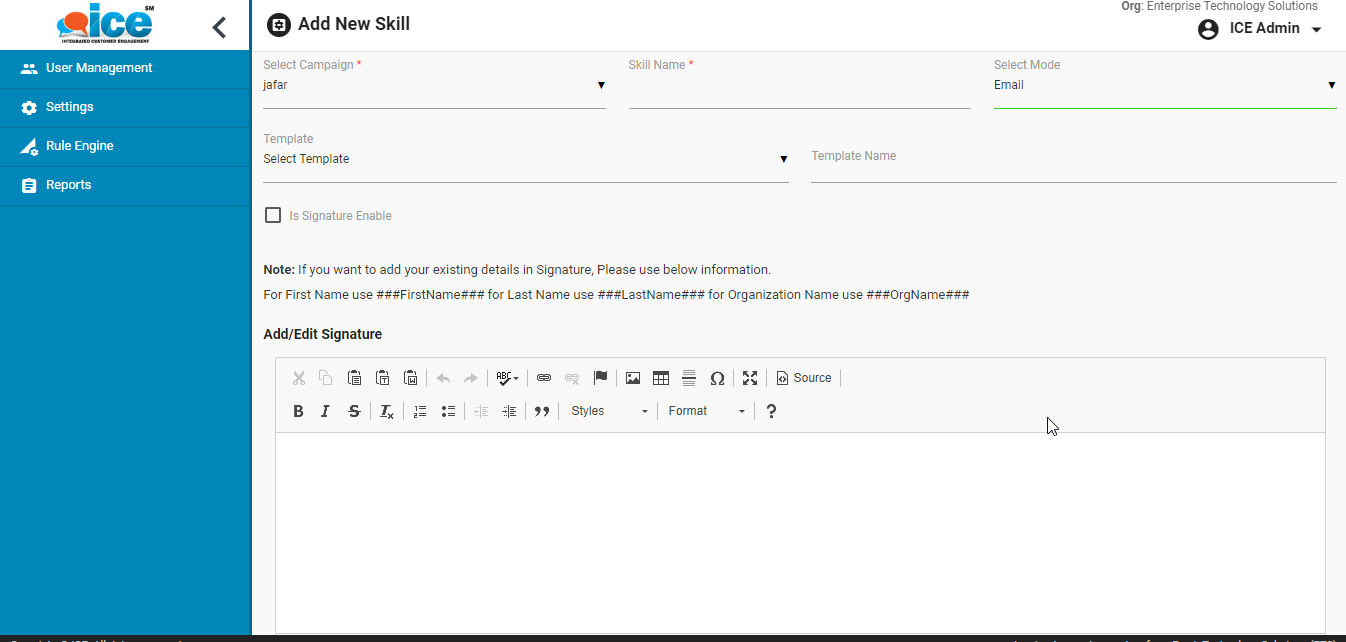
The Email Mode has the following screen elements:
| Screen Elements | Description |
|
Template |
Select the required master Email template from the drop down list. |
|
Template Name |
Enter the name of the template. |
|
Is Signature Enable |
Select this checkbox to enable signature for the email. |
| Add/Edit Signature | One can add or edit the existing details in Signature using this editor box. |
| Do you want to add this Signature as a Template? | Select this checkbox if the newly added or edited signature needs to be added as a template. |
Click  button after making entries in the field. Click
  button to cancel the process.
Facebook Mode
To know about this mode, refer to Connectivity through Facebook Channel.

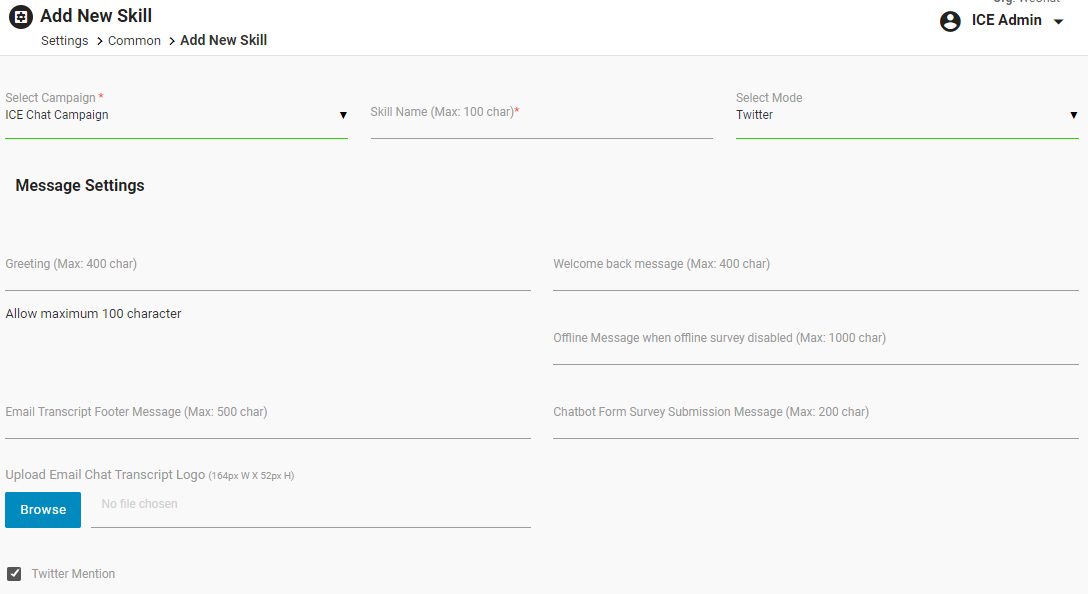
Twitter Mode
To know about this mode, refer to Connectivity Through Twitter Channel.
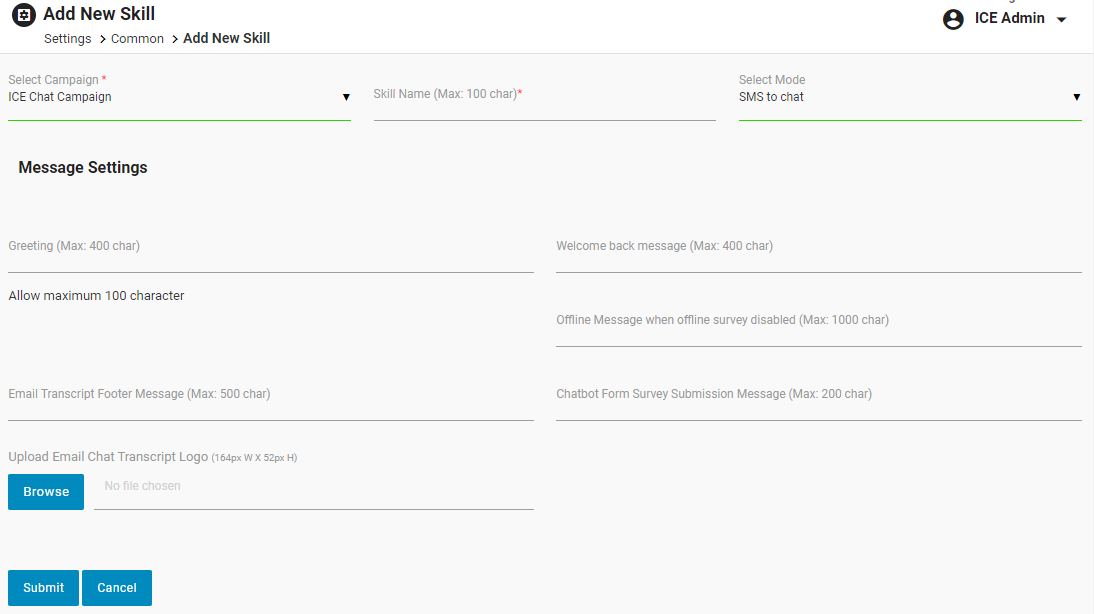
SMS to Chat Mode
To know about this mode, refer to Connectivity Through SMS.
WhatsApp to Chat Mode
To know about this mode, refer to Connectivity Through Whatsapp.