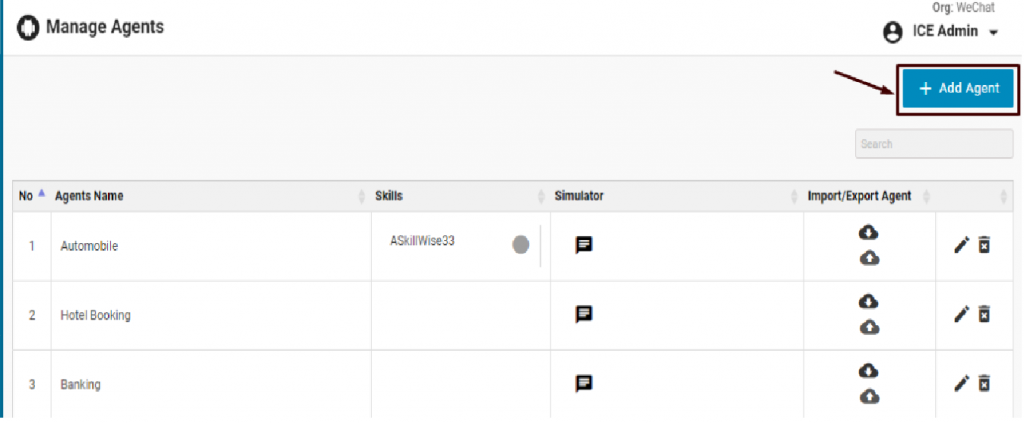
This feature allows an admin to create a new agent. This could be done by clicking Add Agent button in the console as shown highlighted below-

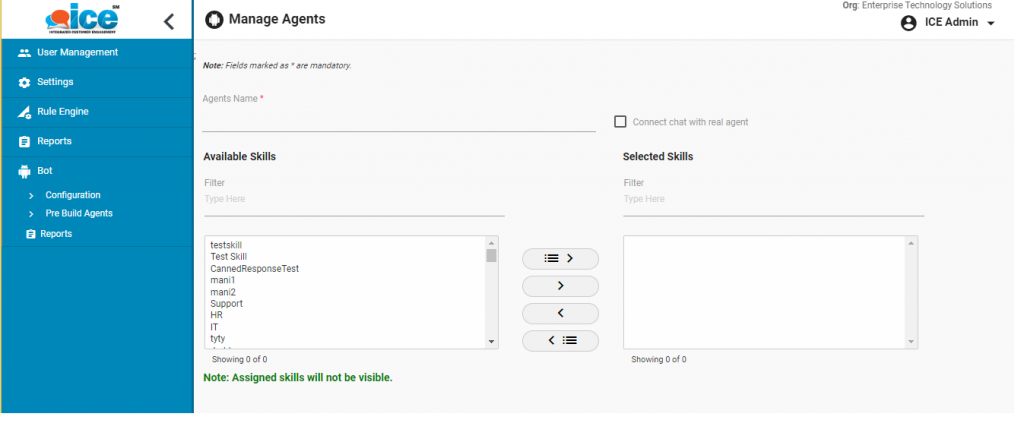
The system will redirect to the following screen-

The console includes several fields each of which is mentioned below-
- Agent’s Name- Name of the agent is meant to be entered in this field.
- Enable Core- This is a check box which has two conditions such as-
- When the checkbox is checked, the chat bot system will strictly follow the “Story Writing” configuration
- When the checkbox is unchecked, the reply to the visitor will be sent via RASA framework.
- Connect chat with real agent- This is another checkbox field, which when checked, allows a visitor to get connected with actual agent.
- Available Skill- Displays all the available skills in the list
- Selected Skill- Displays the list of selected skills. An admin can select one or multiple skills from “Available Skill” table to selected skill through the use of
 or
or  respectively.
 - Browse Photo- Allows an admin to add a photo, which will replace the default bot icon. Once a default bot icon is replaced, it cannot be retrieved again.
- Welcome Message- This is a mandatory field, wherein the admin needs to enter a greeting or welcome message.
- Default fallback response- An admin can enter a comment or response, which will be displayed when visitor is unable to connect with actual agent
Click ![]() button when all the entries are made. The created agent will be displayed in the Create/View Agent console grid.
button when all the entries are made. The created agent will be displayed in the Create/View Agent console grid.